


I was having trouble with adding the text on the pictures, if you have trouble seeing it just click on the picture and it will bring it up larger for you to see.
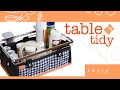
The first thing you want to do is make the inner box. The top piece is before you trim and get ready to apply tape. One thing I do to is before the box is adhered you want to add a cut out to it. I used my tab punch for this.
Then you want to cut out 3 rectangles for the box. Two for the back and front and the 3rd is cut in 1/2 for the flap. I used my scallop rectangle nestie to cut them out. They you want to run them thru the cuttlebug to add a design to the paper. Once you've done that then score them on your scor-pal and apply the tape strips to them.
 Now you will tape them together and they are ready to add the inner box.
 Now you will add the inner box.
Here I added a scallop circle and a 1 3/8" circle to the flap with a button on the front. Behind it is a piece of Velcro for the closure. Add a piece of ribbon for a handle and you are done!
Supplies used:
1 3/8" circle punch
Scallop Circle Punch
Largest Scallop Rectangle Nestie Small
The Angel Company Mimi DP
Ribbon
Fancy Pants Button
Velcro
Scor-Pal
Cuttlebug
Devine Swirl & Love Language folders
I'd love to see what you come up with! If you give it a try, link it back here and let me know. Like I said I'd love to see it!!
Have a great day!!
Hugs,
Joani


4 comments:
I am the recipient of one of these cute little boxes - they are adorable....
Betty
Joani - this is so adorable! I love your creativeness, I'm going to have to try and make one of these.
Hugs,
Marsha
Adorable!
Hi Joani
I love your box.. look adorable.
Thanks for sharing!!!
Greetings, Sony
Newbie Angel!!! ;)
Post a Comment