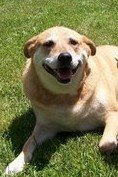
I'm so excited today is Friday. I know, why am I excited ~ I don't "work". Well tonight we are going (yes, this is once again my dear wonderful daughter is rubbing off) to the county fair. But the fun part is they are having a demolition derby. I just love to watch those. And yes, it is a county fair. A little home town fair, just like you see in the movies. It really is a lot of fun. Yummmm ~ is that funnel cake I smell??? :)
Now, on to business.
I needed to start making some goodies for my stampers groups that are coming up. So if your part of them - close your eyes!
I made this little ATC or tag, whatever you want to call it last night. Last night as in when we were having thunderstorms and when they said to stay away from windows. You've all seen my craft room! I'm crazy! But what I won't do for the craft :)
There I go again, my train jumped the track!!
Back to the ATC.
I used Brilliant Blue as a base. Then I cut pieces of the yellow DP from theangelcompany™ Brighten my Day slab to add after I sponged Only Orange ink around it. I thought that it was a little cheerful. I stamped the flower from my TAC™ set Enjoy Today and colored it with markers and added a little stickles to it and I was done.
This card was made for a friend who's birthday is on July 4th so I had to use a sparkler on it!
This set is from Stampendous and it's called Hey there Cupcake. It's adorable. I think that I got on the cupcake bandwagon a little too late - but I just love them.
Anyway ~ the card is Night of Navy and it is layered with a piece of Tempting Turquoise that my dear friend Betty ran thru her cuttlebug. I stamped the images, colored & inked the edges, layered them with Soft Sky and some scrap blue - added the stickles and I was done.
Well, that's all I've got for today. Let's see what I can come up with to show you tomorrow.
Have a great day!!
Class Schedule
(502) 370-7632 Joani
Please call or email us to reserve your spot.
Friday, June 27, 2008
Thursday, June 26, 2008
Howdy Ya'll
Howdy Ya'll!?? My goodness, where did that come from? I can honestly say that my DD is rubbing off on me. Yes, she's getting, or has got the accent from 'round these parts. OMGoodness, there I go again! Ok ~ let's just stop and take a look at the cards...
I'm a bit behind in showing this card. I made this for my hubby's birthday last week. He really does not care too much about my card making. I know there are a lot of hubby's out there who are so supportive - and I guess he is in his own way, but he more or less does not get as thrilled as I wish he would about my craft. Oh, he'll make things for me and the craft room. And he will sit patiently while I go on and on about this and that ~ but he says he just does not understand how I can put time into something that eventually get's thrown in a drawer. And my response to that is "yes. It get's thrown in a drawer and not tossed in the trash. That's the difference between a handmade card and a store bought one". Am I not true? How many of you have tossed store bought cards but not handmade ones? My point exactly!
Ok, now to the card.
Of course I could not make the pink and brown girly card I'm used to making. I wanted something "manly" so I pulled out my Classic Pickups, Lovely as a Tree and Watercolor Minis to make this card.
First the card base is Creamy Caramel. I used some DP from RAK's that I've received to layer with Summer Sun. I made the photo corners from scraps.
For the picture I stamped the truck and trees. I used the little dots (don't know what type of flower it is) from the Watercolor Minis set. I stamped them in Creamy Caramel, Pumpkin Pie, Old Olive and Summer Sun to make it look a little like fall. I then used my pencils to color the ground and I was done.
I wanted to make a thank you card for my daughter to give to her friends thanking them for taking her to Florida. What better scene could I use than a beach scene? I've had this stamp for years and I don't think I've ever used it! Can any of your relate to that ;)
The stamp is from Inkadinkadoo. I stamped it and colored it in with my prismacolor pencils. I have always liked to color with pencils, but my new prismacolor pencils are my favorites!!!
The base card is Chocolate Chip and I layered that with paper from the Berry Bliss collection. After I colored the scene with pencils I sponged Close to Cocoa ink all around the edges. I then added that to another piece of DP, tore the bottom edge and sponged that also. I used the word "thanks" from my TAC™ Trendy Greetings set and stamped that with Close to Cocoa and layered that in the bottom corner with scraps and I was done!
I need to make a couple more thank you cards and I wanted to use the dollar stamps that I picked up at Joann's the other day. I thought that this little dog was so goofy looking I had to get him ~ besides, he was only a $1.00!!
The base card is Real Red and I used TAC™ Cha Cha DP. I thought that looked good together. I stamped the image and colored it in with pencils. I then sponged Only Orange around the edges before I layered it on to Pumpkin Pie and Certainly Celery cs. I layered the DP on to a piece of Pumpkin Pie, and added to large eyelets and some ribbon to the edge of that panel. Once I adhered that I knew it needed something else. I then took another piece of DP to the bottom and cut it with my scissors (yes, I have scissors that cut those scallops - they are from Provo Craft) and punched the holes with my crop-a-dile. I layered that along the bottom edge added the saying and I was through. They are in the mail today!
Thanks everyone for being patient with me and my sporadic posting. Things are a little bit back to normal now so I should be back to my regular posting. Thanks for sticking with me.
Have a super great day!
Monday, June 23, 2008
Monday Monday....
I had a get together at my house last week and this is what we did. My dear friend Betty came over and brought the goodies to make these wonderful wall hanging's.
When she first stopped in she took our pictures and then went to Walmart and developed them. She showed us how to make these and I think that they turned out great. For the actual pieces we covered up cut up pieces of cereal and soda boxes. How cool is that? I've always kept the thin pieces that come in new paper packs, but I never thought of cereal and soda boxes. My DD actually started to throw away a box that the pop corn came in and I said "No Stop!!" yes, she thought at that point I have lost it and I'm ready for the home... But it's true! Thanks Betty for the tip!
Anyway, as you can see we had stuff all over the table. Then my new found stamping friend Stephenie stopped by. She's new to stamping and she needed some help with invites for her hubby's birthday coming up. I had an idea for her but was not sure. She said that her hubby did not like too much "bling". We kept it simple, but they turned out nice. yes, I forgot to take a pic! But take my word for it, they were cute. And I got to meet a new friend. She "found" me by the sign I had on the car. Yes, the one that my DH did not want me to put on there!!
So here are a few more pic's of the wall hanging. We all did them different and there is so much paper and goodies that we put into them I could not begin to tell you who what is from and where. We did cover the back's too to be able to add more as we go.
We used these pre-printed strips with the wording on them to describe what we feel about each other. Another thing would be to write what you feel about the person. I think that they are great! We also thought that it would be best to add our own at the top instead of underneath.
Here's a picture of the table when we were in action. We
Sunday, June 22, 2008
The New Catty is here!!
I'm so excited, are you????
I've been waiting patiently for the new catty to arrive and it's finally here! Ok, my copy is here! And yes I've been pouring over the pages very carefully. I have my wish list ready to go. Of course I keep grabbing the catty and making the list longer and longer ~ but of course!
I will let you all know when I receive my box of catty's that I've ordered ~ then I will be able to ship them out.
Until then........... You'll have to take my word for it that it's just awesome!!
Happy Sunday!
Happy Sunday everyone! I hope that your day's going well. I awoke this morning to the smell of hubby making his wonderful omelette's! They are so yummy!
I've been a little lax in posting lately. Our company from California will be leaving Tuesday and I'm sad. She comes to visit each year, but we are not sure about next year. With the way gas prices are and the airlines raising their fee's ~ I'm not sure.
Well with her here we've not really crafted much, but I did make a couple of creations that I wanted to share with you!!
This one I made using all theangelcompany™ products. The set is called Hello There and the paper is from the Mimi and Bella Flor collections - two of my fav's! Everything is colored with pencils and I used stickles to give the flowers and butterfly a "pop". I then used my white gel pen to make some accent dots around the card. She is so cute!
This is my first 4th of July card that I've made this year. I am really far behind with these!
The paper I purchased at my LSS it is from Creative Imaginations. The base card is Real Red and layered with Night of Navy cs.
The image is from Stampendous! The set is called Freedom Cupcake. I did not see this on my trip to Archiver's but Joyce did. And of course I've looked on line, but it is an Archiver's exclusive. Hmmm, another trip to Archiver's is called for I guess!
I colored the cupcake with my pencils and markers. I added stickles to give it some bling and outlined the Night of Navy cs with my gold Encore pad. I thought it turned out kinda cute....
Lastly I want to show you a card that I made with that yummy SU! paper "Summer Picnic". I purchased this paper a while back and don't want to use it. I'm sure that all of you can relate to that!!
The base card is Real Red and I layered it with papers from Summer Picnic. I used the stamp set Because of You and colored that with pencils. Yes, I made a boo-boo. Something has happened to my Real Red pad and I've smeared ink on the panels so I had to chalk them. I was so bummed! But I guess it turned out ok.
Make sure that you come back tomorrow! I've got something to show you from my "play date" the other day. My dear friend Betty showed us how to make these adorable wall hangings and I so have to share them with you!!
Thursday, June 19, 2008
I'm just tickled.... purple!??!
I just had to share with everyone the cute little shelves that my hubby made for me the other day.
Yes, yes... they are purple. It all started out with a couple of scraps of wood he had. I mentioned to him that I would love to have a shelf on my desk. Nothing fancy at all, just something that I can put my ever growing supply on. My pencils were getting a little soft because of all the windows and light that come in the room. Some of my paper was fading too. So I tried to describe what I wanted. Like I've said a million times before, my head and mouth don't communicate too well sometimes.
Yes, I drew a picture. So for a couple of day's I "nagged" I mean asked him. Then he finally gave in. Just like the flower beds in the back yard. This year we are concentrating on making the back yard pretty. So every time that he does something I say "you know what would look good here" or "that might be an idea to do....." So of course after he made the shelves I was told "no more for this year". Big bummer, but he has done a lot so far.... He's got to get a meddle for putting up with me :)
So anyway, after he made the shelf for my desk he said "I suppose you want it painted too?" but actually my first thought was not to paint it. He used an old shelf that we took down and it was kinda cool looking with the white paint a little "rustic" looking. But we have this can of purple paint that the last owners left here. I don't know what was painted purple, but I kept it.
He painted my shelf and put it on my desk. Totally happy with that of course I could not wait to put up the other shelf above my desk. That's where I am putting all my little do-dad's that I make for the weekly challenges at Paper Wings. For now I'd like to say I'm content....
On another note I'd like to mention the power of advertising. I had got one of those magnetic signs for the car. I'm sure that you've all seen them, I see a lot of Realtors with them. Well over at Vista Print you can score big with the FREE, yes I said FREE products!!!
Well anyway we went out to breakfast for Father's Day. A tradition that we've always had. And there was a lady who got a hold of me because of that sign. Come to find out she lives right up the road from me. We spoke yesterday and she will be coming over tomorrow to stamp with us! I'm kinda excited. One thing that I miss from back home is the get together's with the ladies. So I now have another person here that I can stamp with. How cool is that!
And one for the road.... Since I'm on the "tickled" kick here is a card that I made for a dear friend. It's made with the SU! Tickled Pink set. I got this set a while back and can you believe I've not inked it up!
This card was so super easy to make with my scor-pal. I can honestly say that I could kiss the person who invented that little gadget. And now rumor has it that they have the pad for it. Now you can leave it on your work surface and not have to move it while your creating. You can work on top of it! Check it out on the Scor-Pal site!!!
Well enough of my ramblings, I've got a million things to do today. It's hubby's birthday and I still have not made him a card. Shame, shame on me.
Wishing everyone a very creative day!
Yes, yes... they are purple. It all started out with a couple of scraps of wood he had. I mentioned to him that I would love to have a shelf on my desk. Nothing fancy at all, just something that I can put my ever growing supply on. My pencils were getting a little soft because of all the windows and light that come in the room. Some of my paper was fading too. So I tried to describe what I wanted. Like I've said a million times before, my head and mouth don't communicate too well sometimes.
Yes, I drew a picture. So for a couple of day's I "nagged" I mean asked him. Then he finally gave in. Just like the flower beds in the back yard. This year we are concentrating on making the back yard pretty. So every time that he does something I say "you know what would look good here" or "that might be an idea to do....." So of course after he made the shelves I was told "no more for this year". Big bummer, but he has done a lot so far.... He's got to get a meddle for putting up with me :)
So anyway, after he made the shelf for my desk he said "I suppose you want it painted too?" but actually my first thought was not to paint it. He used an old shelf that we took down and it was kinda cool looking with the white paint a little "rustic" looking. But we have this can of purple paint that the last owners left here. I don't know what was painted purple, but I kept it.
He painted my shelf and put it on my desk. Totally happy with that of course I could not wait to put up the other shelf above my desk. That's where I am putting all my little do-dad's that I make for the weekly challenges at Paper Wings. For now I'd like to say I'm content....
On another note I'd like to mention the power of advertising. I had got one of those magnetic signs for the car. I'm sure that you've all seen them, I see a lot of Realtors with them. Well over at Vista Print you can score big with the FREE, yes I said FREE products!!!
Well anyway we went out to breakfast for Father's Day. A tradition that we've always had. And there was a lady who got a hold of me because of that sign. Come to find out she lives right up the road from me. We spoke yesterday and she will be coming over tomorrow to stamp with us! I'm kinda excited. One thing that I miss from back home is the get together's with the ladies. So I now have another person here that I can stamp with. How cool is that!
And one for the road.... Since I'm on the "tickled" kick here is a card that I made for a dear friend. It's made with the SU! Tickled Pink set. I got this set a while back and can you believe I've not inked it up!
This card was so super easy to make with my scor-pal. I can honestly say that I could kiss the person who invented that little gadget. And now rumor has it that they have the pad for it. Now you can leave it on your work surface and not have to move it while your creating. You can work on top of it! Check it out on the Scor-Pal site!!!
Well enough of my ramblings, I've got a million things to do today. It's hubby's birthday and I still have not made him a card. Shame, shame on me.
Wishing everyone a very creative day!
Wednesday, June 18, 2008
Ok, here I try again!
I've been trying for a few days to post pictures on my blog but Blogger will not let me ~ so here I go with another attempt.
I was fortunate enough to get to go to Archiver's last week and OMGoodness!!! I thought I died and went to heaven. I told my hubby that my DNA is on everything in the store! I first had to go thru the whole store and touch everything, then I went back and picked out my purchases. The store is so awesome! It's about an hour away from me, but well worth the drive! I can't wait to go back.
Anyway - while I was browsing thru the store I had seen (on clearance I might add) this cool looking cylinder object. I had seen one at my LSS once. They did a class on them to make them into a ribbon holder. Well I am always looking for something to hold more ribbon in. You can never have enough ribbon. Well I scooped one up. it was only $4.00 and I am kicking myself now that I did not buy more of them. Well I brought it home and opened it up. There was this cup inside there. I don't remember seeing that inside there at the LSS so I tugged on it to pull it out and of course it was REALLY glued in there, I peeled some of the inside out when I did. But that's fine, it's on the inside and can't be seen. Of course if I really wanted to I would of spray painted it first - but I was in too much of a hurry to alter it!
I HAD to alter it like NOW! So I pushed everything aside and started in on it. Talk about fun! Like I said, I should of bought more ~ they were only $4.00. Then we went to Michael's and I noticed them in there for $9.00!!! I could so kick myself!
Anyway, I covered it in the Bella Flor paper from TAC™ and added some lengths of ribbon. I used my crop-a-dile to punch the holes and set the eyelets for the ribbon to go thru and I was done. Seriously, it was that easy. But I still did not understand what the heck the cup inside was for!? Well if I looked at the packaging closer I would of noticed the word "wine container" on it! Then I saw the web site for Creative Imaginations. Duh!! I was in such a hurry to get it covered I had just ripped thru the packaging and went to town!! You've got to check out the web site for it, there are some fabulous creations on there!
So anyway, here is my picture (keeping fingers crossed that Blogger will let me upload)....
Yippie!!!
Now, the black ribbon is what came with it, I am going to change that~I was just so excited that I had to take a picture as soon as I was finished!!
So simple and easy!! Really, it only took me a few minutes to do.
And the inside. The rip is on the side you can't see of course!
It fits lots of rolls. And I even tried to place on of my larger ones in there and it holds that too!
You can see the pencil cup I made too? Yes, that's the part that I ripped out of the container. I just bought me a set of Prisma Pencils at Micheal's with their 1/2 off coupon! I wanted to put them someplace special..... I love my pencils!!
So I altered the cup too to match ~
As you can see I went a little further with the creativity. I typed a list of all the colors of Prisma Pencils I have so far. I put the name of the color and code and left a space for a "sample" of the color. Then I laminated it so the color stays on the sheet. I folded it and keep it in the back of the cup so I can pull it out anytime that I need to. It's only laminated on one side so I can "add" to it when I get new colors.
Well, this is what I've been up to lately.
Hubby made me a shelf for my desk out of some scrap wood we had laying around, then asked me what color I wanted it. Duh, purple of course!! He also made me a shelf to match above my desk. I now have a place to put all the little things that I've made for Paper Wings and little altered things that I've received. I cant believe the room I now have on my work table. I will show those pic's tomorrow!
Have a great day. I hope that I've sparked some creativity for you all!
Monday, June 16, 2008
Friday, June 13, 2008
Happy Friday Everyone!!
Good morning everyone! I hope that your day is going well.
Like I promised today I will share somethings that I've been up to.
I was a little late getting a card to Patty over at Patty's Stamping Spot, but at least it was sent ~ it's the thought that counts.
Actually her card was very easy to make. First I took a piece of Pretty in Pink cs and used my scor- pal to make the lines. I created a "box" in the lower left corner for the sentiment.
The card base itself is Creamy Caramel. On that I layered a piece of Close to Cocoa and added some Chocolate Chip photo corners. I then added the piece of Pretty in Pink cs that I used on my scor-pal and added more photo corners in Creamy Caramel that I peirced with my tool.
I stamped the image around the pie from my TAC™ set Floral Labels then stamped the pie from my Kid Praises set - that's also the same set the sentiment is from. I cut that image out with my coluzzle and layered it on to a piece of Chocolate Chip I punched with my Marvy punch. I then added a couple of primas and brads and I was finished.
I hope this stirs up some creativity for you. I've been working on something and tomorrow I will show it to you.
Thursday, June 12, 2008
I promise!
I promise to give you something new I've created tomorrow. This week's been a bit busy. Between doctor appointments and getting my DD ready for her trip to Florida tomorrow we've been going non-stop! And yes, we made it to Archiver's!! OMGoodness, that store is awesome! I spent an hour going thru there just looking first! Then I went back and picked out my goodies. I was good though, I did not spend too much ;-) Then when we left I waved goodbye to the store and said "til we meet again!". I sure know that another trip is planned in the future for sure!
So now I'm off to create something...
Hugs,
Joani
Monday, June 09, 2008
I've been bitten by the "tag" post
Barb ~ one of my fellow TAC™ angels tagged me.
The "rules" of the game:
Each player answers the questions about themselves. At the end of the post, the player then tags 5-6 people and posts their names, then goes to their blogs and leaves them a comment, letting them know they’ve been tagged and asking them to read your blog. Let the person who tagged you know when you’ve posted your answer.
Ten years ago:
I was living in California with my ex. As you can see I said "ex" so I really was not too happy. I had found a new passion - stamping. And there the journey began.....
Five things in todays 'to do list':
Snacks I enjoy:
Combos pizza snacks, plain M & M's and Ritz crackers.
Things I would do if I was a millionaire:
Donate money to several charities, help out family, pay off debt & make sure that my DD has the best education she possibly can.
Places I have lived:
Elk Grove, CA for 35 years & Kentucky for the past 3
I will now tag:
Gabby
Nicola
MaryBeth
Linsey
Betty
I've got a few things to do today, as you can see ~ but I'll be back tomorrow with more yadda yadda!
The "rules" of the game:
Each player answers the questions about themselves. At the end of the post, the player then tags 5-6 people and posts their names, then goes to their blogs and leaves them a comment, letting them know they’ve been tagged and asking them to read your blog. Let the person who tagged you know when you’ve posted your answer.
Ten years ago:
I was living in California with my ex. As you can see I said "ex" so I really was not too happy. I had found a new passion - stamping. And there the journey began.....
Five things in todays 'to do list':
- Create
- Stamp on something that does not move
- Take DD & Mother to the doctor
- Finish the laundry
- Go to the grocery store
Snacks I enjoy:
Combos pizza snacks, plain M & M's and Ritz crackers.
Things I would do if I was a millionaire:
Donate money to several charities, help out family, pay off debt & make sure that my DD has the best education she possibly can.
Places I have lived:
Elk Grove, CA for 35 years & Kentucky for the past 3
I will now tag:
Gabby
Nicola
MaryBeth
Linsey
Betty
I've got a few things to do today, as you can see ~ but I'll be back tomorrow with more yadda yadda!
Thursday, June 05, 2008
Just some business.....
Great news!!! The New Fall/Winter Catalog will be here soon! And we will be able to start placing orders on June 23rd!!!
If you would like a TAC™ catalog please contact me, I'm selling them for $4.00 plus shipping.
At this time I am looking for anyone who would like to be in my next round of Stamper's 6. If you sign up to be a part of the next Stamper's 6 you will get a catty for free! I can take payments thru Pay Pal, Revolution Money, money orders and credit cards.
A Stamper's 6 group consists of 6 people who promise to spend a minimum of $20.00 per month for 6 months. And each person takes turns being the "hostess" for that month. What that means is when it is your month you become you get to reap the benefits of being hostess. You will get a minimum 1 free hostess stamp set & one 1/2 off item from the catty! This is a good time to get that scor-pal or bind-it-all you've been wanting. I know that some people spend that much in a week just for coffee. With a promise to spend only $20.00 per month you will get the benefits of becoming hostess once, earn some free stamps and receive a great quality of product! Just contact me for more information or to sign up.
One of the Specials coming up this month is the Build a Flower which is in the new Fall/Winter 2008 Inspiration Book & Catalogue to be released. Build-A-Flower is available to order now!
T-2954 • set of 13 $15.95 Compatible Acrylic Blocks: 1 1/2" x 1 1/2", 1 1/2" x 4", 2" x 2"
Another special is the Butterfly Boxes set stamp of the month. You can get this set for only $5.95 with a $30.00 purchase.
Then there is the Vintage set of the month Bear My Hugs. This set is available for $10.95 with a $30.00 purchase.
If you would like more information, or would like to join in on the fun of being part of a Stamper's 6 group please contact me @ joanmcdonald@roadrunner.com
Happy Thursday!
Good morning everybody! I'm up bright and early (ok for me this is early) and I'm ready to take on the day.
I'm sorry for the lack of posting ~ I've got company here from out of state, well she's more like family. She's been a part of the family as long as I have we could say. So I've been spending time with her. But we have been crafty together.
First thing that I want to show you is a RAK card that I received from Kemi over at KSSdesigns. She's my uplines upline - or as we like to call it my grandma :)
She a talented lady I might add. And isn't that ribbon yummy???
I also made a card - yes it was a little late - for Patty over at Patty's Stamping Spot. I knew that I was not going to make the deadline she had, but I still wanted to send her a card.
Have you ever had something in your head that you wanted to create but it just does not come out that way with paper? Well, this was it. This is not what I wanted to make, but this is what came out.
I used Pixie Pink for the base card. I layered that with Close to Cocoa and then a piece of pink polka dot paper that I got years ago at a show. I wanted to add a length of ribbon but my first mistake was adhering it to the base card before I did so. I like to keep my ribbon tucked under the layers, not around the card so you see it when you open the card. Some people do that, and that's fine - I just like mine hidden.
I then stamped the cow from my TAC™ set An Udder Birthday and colored it with pencils and gamsol. I punched it out with my mega scallop punch and sponged some Pink Passion ink around that panel. I then punched a piece of Chocolate Chip paper with my Giga oval punch and layered the image on to that. I took my white gel pen and doodled around the Chocolate Chip layer.
I took my designer label punch and punched out a piece of Close to Cocoa cs and layered a punched piece of Chocolate chip with my 1 3/8" circle punch. I then stamped the words "an udder birthday?" with Pink Passion ink and punched that out with my word window punch.
Once all those layers were put together and adhered down I took the white pen and doodled around those layers. I added some primas and blingy brads to the card. But it still looked a little plain. So I took my Close to Cocoa pen and doodled around the outer edge.
Even though it was not what was in my head, it still worked out ok.
I wanted to show you a quick sneek peek at something that I'm making for my stampers 6 group. I like to include little things in with their orders, just to thank them for ordering. This set is from theangelcompany™ and is called Auld Lang Syne.
I made this little gift card holder out of an envelope. Neat, huh?? And all those credit card offers that you get in the mail - I seem to get them DAILY. Well, I save the "sample" cards that they give you. You know the ones that say "Joe Cardholder". Save them and you can use them in the gift holders as an example.
Monday, June 02, 2008
Howdy everyone! I hope that today is a great day for you all! I woke to birds chirping, then had to turn on the A/C ~ I think it's going to be a hot one today!
Hubby had to work part of the day Sunday but when he came home we started on the last flower bed in the yard. We bought our home almost 2 years ago and have done little things here and there. The woman we purchased from really did not do much to the yard so we kind of started from scratch. Which in a way is nice, then we can do what we want to do.
I bought some flowers on line that are some of my favorites. They are called four o'clocks. They can over run your yard if you don't keep an eye on them. But they are the prettiest little flowers with the most wonderful fragrance. So we made a flower bed for them. Let me tell you I am pooped from that. I'm not as young as I used to be!
I did get my first rose on the rose bush I talked about before, Mr Lincoln. The plant that I bought for my Dad years ago. Well, it sprouted it's first rose. I wish that you could all smell it, it is so pretty! And the little flowers around it are called Moss Rose. Another flower from my childhood. I love how they grown and spread. They will look pretty over the edge of the barrel once they've grown.
Ok ~ on to business now....
This weekend I tried to get a few things done ~ but with the weather so pretty I wanted to be outside. I think that I've been bitten by the spring fever bug, even though the temp feels more like summer!
I'm in a few swaps as I mentioned before, but this one's theme is "What's in your kitchen". When I thought of this I thought of a SU! set that I've had for years I purchased on EBay that I never knew the name of. It's got all these stamps with kitchen items - and of course when I bought that I had to get a kitchen cabinet to go with it. I can honestly say I really don't think that I have ever used it, but it came in handy for this swap. The cabinet is from Peddlers Pack Stampworks and I bought it a few many years ago.
I stamped part of the image on to a folded piece of white cs. I added the images on the "shelf" and colored them and the cabinet. I then used my craft blade to cut the door of the cabinet so it would "open". I stamped a saying inside, then glued the sides together so only the door opens. I layered that on to a piece of Chocolate Chip cs and I was complete.
Now I know that this card does not match the ATC but I love this stamp. It's from Darcie's, and I bought it long ago at a stamp show.
The base card is Real Red. I stamped a heart image with versamark all over the card. You ask "why hearts?" well I wanted it to match the hearts that are on the recipe. Then on the black (it's hard to see and I'm sorry for the blurry picture!!) I stamped and embossed a jar full of spoons and spatulas from that SU! set above on to Basic Black and used my white gel pen to add some dots to it.
I punched to holes in it and added 2 white eyelets to tie the red polka dot ribbon around.
The main panel I stamped the Darcie's image and colored it in with pencils. I sponged some Real Red ink around that panel and layered it on to a piece of Real Red cs. I added it to the card with pop dots. The photo corner I made with scraps of the red and black cs and added a soup ladle before I tied the ribbon scrap around it and then adhered it to the card.
I've also been working on little goodies that I give out when I have a party. My stampers 6 party is coming up and I had to think of something. So the first thought that popped into my head was 4th of July. Ok, I know it's June ~ but it will be here sooner than you think. Besides, I wanted to use only TAC images and this set still needed to be inked up.
I just took my scallop punch and my 1 3/8" circle punch and made the punches. I colored in the image and it's hard to see but I used stickles for the stars. I used a glue dot to connect the back and front punches and I was done. Very simple.
Subscribe to:
Posts (Atom)