Class Schedule
Please call or email us to reserve your spot.
Sunday, March 30, 2008
Happy Sunday!
Well, not really everyone was hungry ~ but he started cooking and we all got hungry fast. Then I had this realization - if that's what you'd call it. I thought "if I didn't work at Jimboy's when I was younger I would of never known how to make tacos like I do". Then I thought "if I never met my ex I would of never met this his friend and learned how to make his salsa". You see where I am going with this? Probably not, I do things like this sometimes. I get so side tracked. But what it all boiled down to was - everything happens for a reason. Yes, everyone thought that I was acting like I was taking drugs or something!!! But it's true. Everything happens for a reason. Of course my daughter was looking at me funny and said that I sounded like a fortune cookie ~ just call me grasshopper. Ahhhh.
So enough of my soapbox journaling ~ here's what I wanted to show you.
I am in a circle swap on my CMBH MSN site. Well, I thought for a few days before sitting down to make a card. Of course my Mom kept saying "I don't know what to make!" and I kept telling her to think outside the box. The swap theme is geometric shapes. But of course she was not blessed with the ability to think outside the box. When I sat down to make my card I had the idea of a circle card in my head. Just something a little different from the normal square cards.
I used my colozzle and cut out a circle on Pixie Pink. I had to use some of my new favorite paper from TAC, it's from the Brighten my Day collection. And yes, I like the pinks and greens together so I had to use the green paper. I once again used my colozzle to cut out a circle just a fraction smaller. I took that and stitched it with my sewing machine on zig zag. I then adhered it to the card. I then pulled out my Circle Sampler set from TAC and stamped the circle in Pink Passion ink on to Pretty in Pink cs. I stamped inside that circle the word 'thanks' from the same set. I punched that out with my 1 3/8" circle punch and layered that on to a piece of Pixie Pink cs that I punched with my scallop punch. I wanted to put something in the lower right corner so I stamped the words 'just a note' from the Trendy Greetings set in Pink Passion on Pretty in Pink cs and punched that out with my word window punch. Keeping with the geometric shapes I taped that on to a piece of Pixie Pink cs and cut it out in rectangle form.
Still, it needed something more. So I doodled the stitching around the edges of the card with my pink gel pen and added a few primas with the bling and I was through. I hope that the recipient likes it.
I also want to share with you something that I received in the mail yesterday. A good friend of mine Rita (who I miss dearly from California) sent me this adorable Easter card and these new gadgets (ok, maybe new to me) called Fantastix. They are to be used for my gamsol. What I've heard is there are many different uses for them - but I need to sit down and play with them first. Have any of you used them? If so, what do you think? Leave me a comment and let me know.
Well ~ I hope that you all have a wonderful rest of the weekend. I hope to see you all again tomorrow ~~
Saturday, March 29, 2008
Happy Saturday!!
Friday, March 28, 2008
I wanted to post some pictures of my craft room. Now, it's not the greatest ~ but at least I have one. When we were house hunting I wanted to make sure that there was a place for all my "stuff". This place had a sun room built on, how cool is that? Well COLD not cool! The room is right off the house as you can see - and with all the windows it gets cold in the winter, and actually not too bad in the summer. But it is my little space that I can create in and have my "little" fur baby at my feet.
And no, I normally keep the blind down so the ribbon does not get faded. I learned that with my paper the first year that I was here...
This is my space where I sit to create. I get lots of light from the windows which is nice. The one good thing about not having too much room is you keep your stuff more organized than you would if you have a larger space.
In California we had converted the garage into a room - that was our craft room. I can say that this little space is more organized than the other was. I had stuff spread out everyplace. Here, it goes back after I use it.
This is Mom's area. Yes, she's going to kill me for posting this. "Joani, my hair looks awful ~ it's not curled". Yes Mom, I know. You just washed it and can't do a thing with it. If she was a little bit more technologically savvy she'd get me back, but I don't have to worry about that :)
Notice the punch rack? Hubby just put that up for me not too long ago. That was another couple of drawers that I got to clean out. I love having them hanging up. The Mega & Giga punches are a little awkward on there but they fit.
This bookshelf is where most of my stamps are kept. The 7 boxes hold all of my SU! sets. Before I UM them they were on the 3 shelves stacked 2 deep. If you wanted to find something you had to move them around, stack on the floor and look. Now they are in the boxes by category and alphabetized. It's the OCD talking, sorry ;)
Now on to some creative stuff!
You can't imagine the look on my face when I got some mail the other day and opened the package. My dear friend Gabby sent this to me. Isn't i beautiful!! I could not believe my eyes. She is one amazing and awesome crafter. One of the most talented I've seen! And this was for me! Of course when I opened it I mentioned to hubby that she made this out of coasters and that a trip to Ruby Tuesday's was in order. Last year we went there for lunch and our waitress gave me a stack of coasters, I seriously scored big with those. So, when we went for lunch I asked the waitress for some coasters & she brought them to me with our drinks ~ they were round!!! Ok, that's fine. Don't look a gift horse in the mouth right? But now I'm going to have to make a few changes if I want to try this.
If you want to try this take a peek over at Gabby's blog and her wonderful tutorial! She makes everything look so easy.
Well of course my DD had to get her mitts on it and check it out. I told her that it was "mine, mine MINE" so she had to go make one. The kid can sit down and create a card in just a few minutes ~ it takes me all day. Well, that's the OCD again. If it's anyplace near crooked or if it has a little mark - or if it's just not right I start over.... But little missy sat down and made 4 of these! She has that ability. Me, I print of directions and read over them a couple times before I start on something.
Well, she made these and asked if I would take a picture like I do with my stuff. Of course I will. So, I had to show her creation off too...
Enough said for today ~ I will (hopefully) be back tomorrow with more. Have a great day!
Thursday, March 27, 2008
Mounting Stamps
I thought that you would like to take a minute and see this video that I ran across the other day. It's very informative and it gives you a quick tutorial on how to index your stamps on the foam cling. Let's just say that I wish I had seen this before I (goofed) up all my new stamps and had to get more foam!!
I just wanted to take a minute to let you all know that thru the month of April theangelcompany™ is having a sale. It's double rewards! What that means is you host a FUNshop and you will receive double rewards. If your FUNshop is $100.00 or more you can receive any 2 items in the catty for 1/2 price! Now is a good time to get that Scor-Pal or Bind It All that you've always wanted!!
It is also a perfect time to sign up to be a demonstrator! Thru the end of March if you sign up to be a demo you will receive an additional $50.00 in stamps for free! Now, how cool is that?
I know that you'd enjoy being a demo for theangelcompany™ because I sure am. You get to meet so many nice people and get to represent a product that you will fall in love with. As a TAC™ angel the minimums are manageable at just $100 every 4 months - thats only $25 a month which makes it easy to maintain active status even as a hobby demonstrator!!
If you'd like to become an angel or would like more information just email me!! I'm here to help!
Have a great day and I'll be back tomorrow with more!
Wednesday, March 26, 2008
Happy Hump Day!!
The past week or so I've undergone the task of sorting thru my UM collection of stamps. At first I wanted to just organize them. They are in the binders and I really don't care for that system. They are kind of out of site, out of mind. I knew that there were some stamps that I'd use more if I just take them out of the binders. There were stamps that lost their cling, that were falling out of the binders. There were stamps that the cling "slid" off the stamp and there was just sticky stuff stuck to the binder sheet. So, I took the binders and at night while sitting with the family I removed all the old gunky, sticky mess and took them down to the bare rubber. I do have more foam to mount them too but for now I am not. I picked out the stamps that I know I may use the most and re-mounted them and put them in the CD cases. It was not something that I thought I'd like to do. I do like the clam shell cases that SU! and TAC have, but that was not an option either. So BIG LOTS here I come for more CD cases.
Enough of that said ~ on to the card.
Well, thru the mass pile of rubber I had I found these cute little guys. I bought them at a stamps show many years ago in California. I so miss those shows! I needed to make a card for a Hawaiian swap that I am in and I saw the surfboard. What makes me think of Hawaii? Surfboards (ok, not surfing rabbit's - but Easter WAS just here). So I pulled out my stamp from Stamp La Jolla. I've got a few of these images, and I think that they are just adorable. Yes, once again - I've not used these stamps since I bought them. Out of site, out of mind....
The base card is Pumpkin Pie and I layered that with a piece of DP from Bella Press. Shhhh, don't tell my DD - but I "borrowed" that paper from her stash.... and I sponged a little Creamy Caramel around it's edges. I stamped the image and colored him with pencils and gamsol. I then sponged Only Orange ink around the panel, attached it to a piece of Certainly Celery and orange cs, added a length of Pumpkin Pie ribbon to it and glued it to the card. The sentiment, also from Stamp La Jolla is stamped in Only Orange ink also layered on to Certainly Celery and orange cs and placed on the card front. Very easy, and cute I might add....
This next card is also for a swap that I am in. It is a baby themed swap.
I will add that this card was not my idea, it was cased from Lauren Meader's blog My Time, My Creations, My Stampendance. Lauren has one AWESOME blog, and if you are surfing please add her to your blog roll. She has the most wonderful ideas...
I just love these baby cards. I really do not know anyone who is having children or is planning on having any children so I'm sure that I will not have to make any of these in the near future ~ so I was tickled that I could make them for a swap.
Thanks Lauren for the idea :)
The base card is So Saffron. I cut it out per Lauren's directions. I then took my Dotta-riffic pen (that I got years ago and honestly thought they were dried up) and make little dots all over the card. I stamped the image from So Many Scallops on Mint Melody paper with Mint Melody ink and punched it out with my scallop punch. I stamped it again on a piece of Barely Banana and cut just the word 'sweet one' and glued that down. I then used my 1 3/8" circle punch and my scallop punch to make the "trim" around the neck and leg holes. I cut a strip of white for the arms, doodled on some hand "stitching" and I was thru.
Please if you can take a minute to read Lauren's blog. It's very inspirational.
Well, enough for today. I've got some creating to do before my SIL comes to visit. She come's weekly and when she get's here it will be a gab fest so I'm sure I won't get much done.
Hugs,
Monday, March 24, 2008
Pretty as a Princess....
I was chatting with a friend the other day and she is a Chemo Angel. If you'd like more info on the subject click here. Anyway, she received a new patient and she is a little 5 year old girl. She told me that the little girl loves pink, princesses and fairys so I had to help a little. I made a couple of cards to send to her.
For this first card that I made I used the Pretty Princess set. This set has not had much use out of it since my DD was little so I just had to use it. The main card is a pale pink cs that I bought at a show years ago. I used the scor-pal to make the diamond shapes on the Pink Passion cs. I then stamped the images and colored them in with my pencils and SU! markers. I sponged Pretty in Pink ink around all the edges and layered them on to Pixie Pink cs. The border at the bottom of the page is from my SU! Accents & Elements Sweet Nothings tin. I added some stickles to the card and I was thru.
This is another card that I made using my SU! sets. The base card is Pixie Pink. I layered that with papers from my TAC Sands of Time collection that was sponged with Pink Passion ink and run over the scor-pal to create the background. I sponged some Creamy Caramel ink to "grunge" it up. I stamped the image from the Fairy Nice set, colored it with pencils, sponged Pink Passion ink and placed that right on the card.
I punched out a tab with my round tab punch and stamped part of the saying with Creamy Caramel ink and a tab from the Lillianna collection to stamp the rest of the saying. I then used my Crop-a-dile to add the eyelets and then placed that on the card. With some left over scraps I made a photo corner, attached a scrap of ribbon and glued that in the upper right corner.
I only hope that these cards bring some sort of joy to a sick little girls day.
I'm not sure how much I'm going to get done today ~ but I will try. Here's wishing you all a happy and healthy day. Remember to tell the one's you love how much they mean to you.
Friday, March 21, 2008
Happy Friday!!
Today is supposed to be a nice day. The last nice day, we're supposed to have a few showers or so over the weekend. They are even saying that we might get some snow Monday ~ how weird is that?
I thought that I'd share this card with you first. I just love it. Those cows are too stinkin' cute!!
This card is made from the What's Moo set. The card itself is Basic Black. I then layered a piece of Pixie Pink and a piece of DP from the Uptown Girl slab. I then added another piece of Pixie Pink to a piece of the black from the same slab. You can't really tell, but the black from the Uptown Girl paper looks almost like linen. I then tied a length of ribbon around those layers. I stamped the image and colored it in with pencils and gamsol and sponged Pink Passion ink around the layers. I added that to a piece of Pixie Pink and Black and used pop dots to add it to the card. Well, there was no place for a sentiment panel so I just stamped the word "holy cow" to the left of the image on that layer and I was thru.
Yesterday I promised you a card made with the Stamp of The Month, well here it is. The set is called Goody Jar. If you look to the left of this post you will see all the stamps that come in this set.
When I first saw the set I was a little excited. You see I had a friend in California ~ the same one that claims she's perkier than me, but I know the truth (he he he) and when she left the placed that we worked together one of the guy's in the office gave her one of these. It was the first time I had ever seen a fish in a vase with a plant on top! Hmmm, I wonder if it's still alive??
Anyway, on to the card. For the base card I used Soft Sky and layered a piece of Blue Bayou and a sheet of DP from the Sands of Time collection. I rounded all those corners and inked up the left side with Bliss Blue ink. I stamped the images and colored them with pencils. I then inked up the edges with Bliss Blue ink, rounded the corners, layered that on to a piece of Blue Bayou cs & added a length of green grosgrain ribbon before adhering it to the card. For the sentiment I used a saying from A Wittle Bug. The saying said "thanks for everything" well I took the h out of thanks so it read "tanks for everything". I stamped that in Bliss Blue, layered it on to a piece of Blue Bayou cs, then layered that on to a piece of Gable Green that I punched with my Round Tab punch. I used my slit punch and made 2 slits in the paper and slid the whole thing into the slits. I then secured it with a couple of eyelets. Once I set the eyelets I then taped the whole panel to the card and I was done.
This set is so versatile. You can use it as a cookie jar, a vase or a penny bank. Right now it is only $5.95 with a $30.00 purchase! That's a great deal ~ tell me where can you get 11 stamps for only $5.95? If you'd like to own one as me how!
Hopefully tomorrow I will be able to show you some fairy and princess cards that I've been working on. Until then, thanks for stopping by and have yourselves a wonderful day!!
Thursday, March 20, 2008
More TAC-a-licious Cards
Wednesday, March 19, 2008
It's no wonder I love TAC
It's that time of year
Have a great day!
My "little?" Baby
My DD for the past few nights has asked me to take her to Dairy Queen. She's just had the craving. Of course we have ice cream in the freezer and DQ is only 3/10ths of a mile from our front door ~ but she wanted it, and of course it did not sound too bad!
So we piled in the car ~ ya think we could of walked it - but no. She needed it QUICK... And drove there. We proceeded to order and I then ordered a cone too. Danielle says "Mom, you already got a blizzard!" ha! she thought it was for me!!! Nope. It was for my "wittle itty bitty" fur baby. Yes, for the same fur baby that also gets happy meals and toys at all the holidays. She even has her own presents under the tree! After all, she was born on Christmas day.
We get home and Danielle wants to carry it in to show Ricky. Yeah, like it was her idea - after she yelled that the dog did not need it. So I grabbed it and brought it in to Ricky. His eyes light up. Mind you, the first time he saw the dog he said he just wanted to hug her - most people run the other way because of her girth. She is all bark and no bite, really. She puts on a show then just lays down and ignores you.
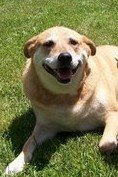
So anyway, Ricky got the job of feeding it to her. At first she wanted to just bite the cone down in one gulp. But he told her no and the darn dog actually licked the cone. Yes, I had to get a picture. And yes, I will put it in the album.
Enough of the Ginger saga. I will write more on that subject later!!
Tuesday, March 18, 2008
I love my new TAC™ stamps!
I've had my kit now for little over a week, and I am having so much fun with it. I have always been a Stampin Up lover ~ for as long as I've been stamping. I even pulled out a few of Stampin Up's foam stamps (for those of you who can remember that far back) the other day. And yes, SU! will always hold a place in my heart ~ but it has to make room now for my angel stamps!!
I guess I have been in a spring mood lately with all the bight and cheery colors. With the weather lately - the sun shinning, the birds chirping, it's been lovely. Of course like my hubby says "if you don't like the weather just wait 5 minutes" and of course, only in Kentucky! Today we are supposed to get a lot of rain. But the past few days have been wonderful. I think that I am going to stick the bird feeder out! Yes, they ate ALL of our sunflower seeds off the plants last year, but that's ok. They've got to eat too!
Ooops, the train de-railed again! I get so off track sometimes ;)
About the card, yes. That's what I was talking about ~ the cheery colors and such. Well, I just could not resist more cheerful-ness (and to a dear friend I left in California - I'm the perkier one!) I just had to use the yellows from my Brighten my Day pad.
I am trying to make a bunch of cards that have my TAC™ stamps on them. Of course I want to use them, but I want to make a few more to keep as samples to show. This card was actually made for a friend who just signed up with TAC™ under me. Already a downline! Yuppers, I am really happy about being an Angel, and I want to share that with others. So I made this little card to just say "hi" and thank her for signing up with TAC™.
The base card is So Saffron and I layered a piece of yellow dotted paper from the Brighten my Day collection that I sponged with So Saffron ink on top of that. I then took another piece of So Saffron and layered the yellow flowered paper that I sponged on top of that after I added a length of pink rick rak to it. I stamped the little chick from Little Friends, colored it with pencils and sponged around the outside also. I layered that on to a piece of Pink Passion cs and So Saffron cs. For the sentiment in the lower corner I stamped the "hi" from the Little Friends set on So Saffron and layered that on to a piece of Pink Passion scrap and I was thru.
I'm still not sure if I like this card or not. I LOVE the Purely Pomegranate paper, and I'm just as in love with the DP from Heidi Grace ~ but I still don't think that the chair goes well with it. But oh well! It will have to do.
The card base is Purely Pomegranate. I layered the DP from Heidi Grace on top of a piece of Wild Wasabi and distressed the edges. I also sponged some Old Olive ink around the DP. I also used my corner rounder on the top right of the card.
I stamped the image from Everyday Events and colored it in with pencils. The flowers are colored in with my SU markers. I used my Mega Scallop Circle Punch to punch out the image, then I sponged Old Olive ink around that. I then punched out the piece of Wild Wasabi with my Giga Scallop Circle Punch and used my white gel pen to doodle around that panel. Lastly I stamped the word "hello" from the Trendy Greetings set with my versamark pad and I was done!
Now I would like to show you a little basket that I made for my DD's teacher. She likes the little things that I make and I thought that this would be nice for Easter.
I can not take credit for it though. Yes, I did make it ~ but I first saw it on Leslie Millers blog Running with Scissors. You must check out her blog, it's amazing! Go there to check out the so simple, easy peasy instructions! These are so cute and quick and easy to do that you'll have a dozen done in no time!!
Well, that's enough for me today ~ I've got to go! Time to create.
See you back here tomorrow, same time ~ same place!
Monday, March 17, 2008
Happy St. Patrick's Day
First of all I would like to wish everyone a Happy St. Patrick's Day! I hope that today brings you all good fortune and many friendships!
I would like to share a little card that I made over the weekend. I pulled out one of my new TAC™ stamp sets out, Party Time. I just love this little set.
When I first started to pick out the colors for this card I thought of something spring like, and I pulled out my new papers from TAC™ too!! I used the orange flower background paper from the Brighten my Day collection.
The main base of the card is Only Orange. I then layered the orange DP next that I sponged with Chocolate Chip ink, used my corner rounder punch on the corners and adhered it to the card. I stamped the little ladybug from the Party Time set and colored it in with pencils. I punched him out with my 1 1/4" circle punch and sponged it with Only Orange ink. I then punched out a piece of Pumpkin Pie cs with my 1 3/8" circle punch, then a piece of Only Orange cs with my Scallop Punch and finally a piece of Chocolate Chip with my Mega Scallop punch. I layered those all together and adhered it to the card front.
I wanted to use my word window punch to punch out the saying but the saying was a little too long. So I stamped the saying on to a piece of white cs and measured how long it was. I then punched out 2 word windows and taped them together to make the length of the saying. I then traced around them and carefully cut them out with my scissors to make the window longer. I know it seems like a little extra work ~ but when the punch does not fit, you improvise :)
I added a couple of eyelets with my Crop-a-dile and threaded some Pumpkin Pie ribbon thru the holes in the eyelets, adhered it to the card and I was finished.
This is a step-by-step instruction on how I made my Word Window Punch a little longer. If it is too hard to read, just click on the picture for a better look :0)
I would also like to thank everyone who participated in my blog candy contest. You all made some great cards, but unfortunately there can only be one winner. The winner was picked thru Random.org and it was Linsey from Outside the Lines with Linsey. Linsey, please e-mail me your snail mail info so I can get your goodies out to you!! Thank you all once again!!
I hope you all have a safe and happy St. Patrick's Day ~ there will be more to come tomorrow!
Friday, March 14, 2008
A little bit of this, a little bit of that...
First things first. I needed to make another card for my MSN group - Cards Made by Hand (hey, where have I heard that?) so I opted for quick and simple. The stamps are from MSX, and yes I have all of them!
The base card is Real Red (of course!) and I've layered Lovely Lilac and a piece of DP from K&Company over it. You can't see it too well unless you click on the picture, but the stamp is a 2 part stamp. I first stamped it in Real Red, then the 2nd part says "Red Hat" is stamped in Lovely Lilac. I sponged Real Red around the image panel. I took a length of purple ribbon and wrapped it around the panel before adhering it to the card. The tag says "red hat babe" and is stamped in Almost Amethyst and I added a red eyelet and attached it to the card with a pop dot.
I'm in another swap called Monochromatic. I thought that shades of pink were in order for this little cupcake!
The base card is Pink Passion. I layered a piece of Rose Red and a piece of the polka dot paper by O'scrap! on to the card. I stamped the image (one by TAC of course!) on to a white panel and colored it in with pencils. I sponged Pink Passion ink around that panel and I layered that on to a piece of Pixie Pink and the pink check paper that I've had forever. I cut a length of pink ribbon and attached that to the panel before adhering it down. I made a photo corner from scrap and placed a pink eyelet in the center of it. Once adhered I stamped the saying "share your cake" in Pink Passion ink just above the ribbon (IRL is can be seen better than in the picture). Once it was put together I added a little stickles to the icing and I was done.
OH!!! I so have to tell you! My dear friend Betty from Ladybug Scraps came by the other day. We planned on going to lunch then coming back and crafting. Well, that was a double bust. Life once again got in the way and we did not get to have lunch together, but she did come over. And no, we did not craft either! Things never end up the way I plan. But we did have a nice visit, and we did sit in the craft room. But we just chatted.
Well, Betty knew that I've been wanting a scor-pal and she was kind enough to bring her's over. She left it for me to use, and use I did. I needed to make a card for my neighbor, and my DD's BFF - yes, they are one in the same. So of course having the lovely scor-pal to play with I went to work and made a mini milk carton and card for them - and a little box for one of my DD's teachers who likes crafty little things.
The image on the card is from Whipper Snapper. I stamped it and colored it in with pencils. I then punched the image out with my Mega Scalloped Circle punch and the panel behind it with my Giga Scalloped Circle Punch. I then doodled dashes and dots around the 2 layers with my gel pen. I layered the scallops on to a piece of green vellum, added the eyelets and word window punch before adding it to the Green Galore card base. Once it was all in place I added some stickles to the circle around the image and I was done!
The little box and milk carton were done in Glorious Green and stamped with images from the PSX - Irish Blessing acrylic set. I also crimped and shredded green construction paper to add to the milk carton. I punched holes in the top of the milk carton and threaded some green ribbon thru it to keep it closed. The tag is the large shamrock from the PSX set that I stamped with Green Galore ink and cut out. I attached that with a piece of silver twine.
Some of you have also asked me how I've added my signature to the end of my posts. Well, that's easy! Just go to My Live Signature and type in your name. It will give you a HTML code to paste into your blog and add your signature. What I've done is save the code in a word document and pull it up to copy and paste when I'm at the end of my post. When your at the end of your post, if your using blogger just switch from COMPOSE to EDIT HTML and go to the very end and paste. Then switch back to COMPOSE and make sure it came out ok. Very easy ~ trust me, it has to be if I can do it!!!
Well, that's all for today. And I hope that some of you have a chance this weekend to try out my blog candy sketch. I've been adding more and more to my list of goodies that I'm going to send. Go ahead, try the sketch!
Wednesday, March 12, 2008
A mish mash of everything....
This past weekend I posted pictures of our snow that we received. Well a day after it stopped I thought that I'd shovel the driveway. Of course I got up that morning all ready to go and who would of known that by dinner time all the snow melted off the driveways, sidewalks and roads!! But at least it was a little bit of exersize.
One of my 'favorite' things to do is embarrass my DD. She is at that stage now that everything Mom does is embarrassing! And yes, I take this to the extreme at times. I tell her "this is my time. When you have children you can do the same to them". It does not help that my father was probably one of the biggest teases ever. I inherited my dorky-ness from him :)
I got sidetracked again - choo choo, my train de-railed. Anyway, I got up knowing that I wanted to shovel the snow and put on my layers. I've got long johns on, a sweatshirt, a jacket, 2 pairs of socks (that my hubby got me for Christmas in the hunting department.... mmmmm so warm) and the stupid hat. My DD's father sent her this hat the 1st year we moved away. Of course she would never wear it, hell-o! She might mess her hair up, not to mention that it is a stupid looking thing with the big ball on top. Yup, just up my alley. So I proceed out front *gasp! from my dear teenager* "You are NOT going outside looking like that" oh yes daughter dear, I am! So after a little bit she's got to come out and throw snowballs at me - And she wanted me to lift her out of the snow angel she made? HA!
Ok - enough of that stuff. I just had to show you how silly I really am! Yes, it is a family traight - and dear daughter you WILL once become your mother!!
Now on to biz-ness!
A little over a week ago my stampin' friend Betty came by and we were chatting away. I mentioned to her about a ribbon holder I saw A LONG time ago on line. I can't remember if it was on Scrapbook.com or SCS - but I had to have it! It was a big 4" or 5" PVC pipe that someone split down the middle and hung on the wall. Well I've been to Lowe's and the PVC pipe was a little costly and you could only buy it in an 8 foot length. You only need 1/2 of it because it is split down the middle, and what was I going to do with 16 feet of pipe? Ok, yes - I WISH I could fill that but I'd be in divorce court before you know it if I did :) Then Betty and her hubby went out to buy it! She split it with me and her hubby even made those cute little 1/2 circles out of wood for the ends so the ribbon would not fall out! It was so generous of them! So I got my DH to put them up the other day. Yes, I still have ribbon left to put in them, but it is not on spools - I need to find some empty spools or something to put the ribbon on. THANK YOU BETTY!!! Your the bomb ~ ka-boom!!
Now some of you might remember that I signed up to become a demo with theangelcompany™. Well, my kit came in and I've been fondling rubber ever since. As some of you know I had unmounted my SU! stamps a while back and posted it on my blog how I did it. I do not regret it one bit! I have so much more room! Well, TAC™ stamps are UM, and they do come in the clamshell cases like SU! however they do not have the indexing stickers like SU! does. Well, that's fine - really. But my Mom has a hard time telling what stamp is what just by looking at the rubber. So, I had to think of an idea to help her out too. I am not really one who likes the CD cases, or at least didn't. On a trip to Big Lots the other day I got a wild hair and decided to buck up and put on my big girl panties again and just be like Nike - and do it! I bought some CD cases and DVD cases. One of the reasons that I did not like putting my sets in CD cases was the bigger the set it does not all fit. Well I thought to put my bigger sets in the DVD cases. The ones I bought were the slimline and they did not fit the stamps. Then the light came on!!! I took my movies that I have not and switched them to the thin cases and used the old DVD cases my movies were in! And they fit the larger sets perfect!! I printed the name of the set and code number on to a piece of white paper with my printer and stamped the images on to that piece of paper for Mom and it looks great. I was even going to go as far as color all the images, but I might save that for a rainy day. Mom likes to look at the colored images (she loves House Mouse stamps because they are colored) but I was not that eager.
So what did I do? I made a card!!
I sent some TAC™ catty's out in the mail the other day and I wanted to make a card to go with it! I used the set "What's Moo?" from TAC™. I love love love this set!! And of course it was appropriate to use, what's moo? Me being a demo for TAC™!! So if you are reading this and I sent you a catty, this card is with it!!!
I used the What's Moo set from TAC™ and stamped the cow and colored her with pencils and gamsol. I have had this cow print paper from Darcies for a long long time and now was the time to use it!
The main base of this card is Certainly Celery. I stamped the "What's Moo?" and the "Howdy Ya'll" in Old Olive ink. I layered the cow print DP and the cow itself on Purely Pomegranate. Before I layered the cow image on to the card i used my black sparkle gel pen and drew the dashes and dots on the card then layered the image and I was done. There is also a cow set in the TAC™ spring mini that is adorable!!! If you'd like to take a look peek here.
Well, now that I have completed my "novel" I think I'm finished. It's time that I go do a bit of blog hopping of my own. Have a safe & scrappy day!!!