Class Schedule
Please call or email us to reserve your spot.
Thursday, August 26, 2010
Howdy Ho Everyone!

Wednesday, August 18, 2010
Did you figure it out?

Tuesday, August 17, 2010
Ready, set, Post it!!
Monday, September 14, 2009
Good Morning
This was an acrylic frame that Betty and I got from Dollar Tree, they are sturdy. When I was working I would of loved to have something like this on my desk.
Sunday, September 13, 2009
Post it's anyone?
Wednesday, September 02, 2009
Post it!

I made these little post it note holders. Are they not perfect for your purse or car? Even to leave them on your desk?
The base of these holders are Brilliant Blue, Yo Yo Yellow and Almost Amethyst. The other punched layers are Pixie Pink, So Saffron and Lovely Lilac. I stamped the images from my In Full Bloom set that I colored in with my watercolor crayons. I cut the image out with my coluzzle and layered it on to 2 alternating pieces that I punched with my Marvy punches. I paper pierced the outer scalloped layer. The bee was also cut out and pop dotted to the top for a 3D effect. I used a small piece of velcro to keep the holder closed.
Here's another holder that was made for the long post it notes. The base of the holder is Marigold Morning that I layered with some Rainbow Sherbet DP. I added a piece of ribbon and stamped the word "notes" from my TAC grab bag of stamps I had. These were quick and easy and make nice gifts. I do have to say that the idea was not entirely mine. I picked it up from Beth over at Blooming Where I'm Planted. She's got lots of ideas, go check her out!!Tuesday, September 02, 2008
Good morning everyone! And some birthday candy

ed to use some of my yummy paper from SU! I was so in love with the Berry Bliss paper that they had - and now that it's gone I had to fall in love with another, Bella Rose. To me it's almost as nice as the Berry Bliss ~ but then anything that has to do with card making and is brown is ok in my book!
There is another lady that I've met on line thru one of the forums that I belong to. She's having a bit of a hard time right now and I wanted to make something that might cheer her up. And of course one of my favorite flowers is daises. Some more DP that I have in a drawer that I don't know who it's from. I do have lot's and lot's of paper like that. Sunday, August 24, 2008
I've been busy, can you tell?
only had 1 piece of the candy paper. It came out fine. And of course she does not like pink too much, but I did make it mostly brown.... I so hope that she likes it.
Then she wanted a can for her pens and such for her desk. She wanted purple and turquoise. Well, I did not have any turquoise paper so I had to improvise and use sky blue. So I made these items for her. The can say's "Tonya" and I used my cricut machine to make the letters for both the cans, the Base Camp cartridge. Do you remember the other day when I said that I received a call from a lady who buy's from me at the Peddler's Mall? Well, she had a friend who wanted 11 of these post it note holders for Tuesday. She wanted them to say "Thank you" instead of "notes". So I finished those up and packaged them so they are ready to go.
She wanted 11 of them ~ 9 for females and 2 for males. The one on the end was the "guy" one. There is no flowers on it :)
Then I wanted to make a little gift for her to thank her for getting the post it note holders, so I made this.
I took one of the cases that the Angel Company stamps come in and used rub on's to decorate it a little. I took a note pad and "covered" it with paper and decorated it a little with some primas and a sentiment that I punched out with my word window punch.
I added a length of ribbon on the side to "attach" a beaded pen. I also altered a black clip and I was done.
I really got a lot done yesterday. I was pretty proud of myself. I stopped once to take my DD and her BFF to the Humane Society. Well, no not take THEM, but take them to go volunteer. Silly...... And I stopped once and ate. But I was pretty much sitting in the craft room all day. I guess it shows, huh?
I do have to apologize for not listing any of the papers that I've used. To be honest, I don't think I could tell you anyway. I have lots and lots of drawers packed with paper. I do have 2 drawers listed with TAC and SU paper. But most of them are just papers that I've picked up from here and there. I can tell you that the plain card stock is from SU! They are the only ones that I buy cs from.
Well ~ today I am off to visit with family. We are going to my sister in law's to visit my hubby's niece and her little baby. Ricky's great niece. Boy, I bet he never thought he'd have one of those. Time goes by so fast!! I can't believe that my daughter is already a junior in high school.
So I'm off ~ and take the time today to call or visit the ones who are close to your heart!
Hugs,
Joani
Friday, July 25, 2008
Happy Friday
Well, here's my first card to show you today. I made this card using my TAC set Kid's Praises.I started off with the scor-pal and made some score line on the piece of cs. Then a nifty little trick that I learned from Mel over at Mel Stampz was to use a crayon to highlight over the score marks. My daughter, yes even still at 16 loves to color ~ so I "borrowed" her crayons to do this.
I colored the image with my pencils and gamsol, layered it on to the card with scrap pieces from the Mimi paper collection with a length of ribbon and I was done. Quick and easy.
Here is a card that I somewhat cased from Becca over at Amazing Paper Grace. I just love all of the layers on her cards. And everything is always so pretty.The base card is Creamy Caramel. It is layered with Chocolate Chip, Really Rust and a piece of DP that I have no idea where it came from - but I like it.
I punched the scallop circles with my Mega and Giga punches. Then I punched a square with my 1 3/8" square punch out of the center of the rust panel. I punched another square with my 1 1/4" punch in Creamy Caramel and the acorn with the 1" square punch. I glued down the Chocolate Chip panel then the ribbon and tied a knot and then used pop dots to place the Really Rust panel down. Once I did that I doubled the layers of pop dots under the acorn and placed that down in the center. I used my word window punch to punch out the sentiment and I "made" another word window punch in Really Rust to go under that and glued that down in the corner.
I want to leave you today with a few of the things that I've been working on to sell at the Peddler's Mall. It seems that the notepads and post it notes are good items to sell. So here are a few that I've made to put there.This batch I used my SU! paper Au Chocolat. I just love this paper, and if I knew where to get my hands on more I would.....
These are post it note holders with matching clips.
Here are some more post it note holders. I covered the coasters with some TAC paper from the Brighten my Day collection. I also made the little clips to hold them to the coaster and beaded pens.These are along the same lines as the post it note holders ~ just note pads. I covered some chipboard with paper from TAC's Uptown Girl collection with the clips. I thought that the ribbon was perfect to go with the paper.
And last but not least more post it note holders. This one I used TAC's Rustic Chic paper. I just love how it looks all distressed and you don't have to do a thing to it! These are a little bit more "fancy" than the others :)
I wanted to say that there is a whole world out there of knowledge. I can say that since we've moved here I have not been able to attend any stamp shows or classes. I miss the stamp shows that we used to go to in California ~ but everything that I've learned since then has been off the Internet. So even if you make something and you thing "nah - I won't post that" please do. You never know who might be out there just wanting to re-create what you just made!
Now if I can stay off the computer long enough today, maybe I could create something!
Have a great day!
Hugs,
Joani
Monday, April 21, 2008
Busy busy busy!!
I've been busy making things to sell if you remember at a local Peddler's Mall. Well, so far I've got cards, small notebooks, post it note holders, pens and paintcans. I feel that there is still something missing - something more that I want to make, but I just cant put my finger on it. Of course it will come to me after I take this stuff down and put it in the booth.

These are some if the post it note holders and the notepads that I did. They of course have matching pens with them. For the bag toppers I am going to try my first attempt at making my own rub-ons. I think that I might put something like "a little gift from me to you" on the top. Or something to that effect.

There is so many different papers that I have used it's not funny. So I'm sorry if I can't list everything. BUT, I can tell you that the little notebook right here with the word "notes" in white and the one on the top picture in the middle have the papers used from the Catelynne collection from TAC™. That's one of my favorite papers I think.
Another of my projects was to do some paint cans. I will let you know that the cheapest place I've found paint can's are at Sherman Williams. They are just up the street from me. They are only $1.60 per can for the quart cans. I know the last time I looked at Lowe's they were $3.00 each!!I wanted to show you an up close look at this can. I "colored" in the image with stickles. I thought that it gave it a cute little touch. The bee on the lid also has stickles on his wings ~ but the picture does not show it. I think I need a new camera.
Here's a look at the front's of the paint cans. I love the brads with the crystals in them ~ I don't use them too much on my cards because they stick out so much and I'm afraid of sending them thru the post office. I know to mark "hand cancel" on them but sometimes they still get damaged.Well, I hope that you like what you see and I hope that it inspires you to create something nice today. I'm off to create!
More tomorrow.
Friday, March 28, 2008
I just had to share a few little things with you today.I wanted to post some pictures of my craft room. Now, it's not the greatest ~ but at least I have one. When we were house hunting I wanted to make sure that there was a place for all my "stuff". This place had a sun room built on, how cool is that? Well COLD not cool! The room is right off the house as you can see - and with all the windows it gets cold in the winter, and actually not too bad in the summer. But it is my little space that I can create in and have my "little" fur baby at my feet.
And no, I normally keep the blind down so the ribbon does not get faded. I learned that with my paper the first year that I was here...
This is my space where I sit to create. I get lots of light from the windows which is nice. The one good thing about not having too much room is you keep your stuff more organized than you would if you have a larger space. 
In California we had converted the garage into a room - that was our craft room. I can say that this little space is more organized than the other was. I had stuff spread out everyplace. Here, it goes back after I use it.

This is Mom's area. Yes, she's going to kill me for posting this. "Joani, my hair looks awful ~ it's not curled". Yes Mom, I know. You just washed it and can't do a thing with it. If she was a little bit more technologically savvy she'd get me back, but I don't have to worry about that :)
Notice the punch rack? Hubby just put that up for me not too long ago. That was another couple of drawers that I got to clean out. I love having them hanging up. The Mega & Giga punches are a little awkward on there but they fit.
This bookshelf is where most of my stamps are kept. The 7 boxes hold all of my SU! sets. Before I UM them they were on the 3 shelves stacked 2 deep. If you wanted to find something you had to move them around, stack on the floor and look. Now they are in the boxes by category and alphabetized. It's the OCD talking, sorry ;)

Now on to some creative stuff!
You can't imagine the look on my face when I got some mail the other day and opened the package. My dear friend Gabby sent this to me. Isn't i beautiful!! I could not believe my eyes. She is one amazing and awesome crafter. One of the most talented I've seen! And this was for me! Of course when I opened it I mentioned to hubby that she made this out of coasters and that a trip to Ruby Tuesday's was in order. Last year we went there for lunch and our waitress gave me a stack of coasters, I seriously scored big with those. So, when we went for lunch I asked the waitress for some coasters & she brought them to me with our drinks ~ they were round!!! Ok, that's fine. Don't look a gift horse in the mouth right? But now I'm going to have to make a few changes if I want to try this.
If you want to try this take a peek over at Gabby's blog and her wonderful tutorial! She makes everything look so easy.
Well of course my DD had to get her mitts on it and check it out. I told her that it was "mine, mine MINE" so she had to go make one. The kid can sit down and create a card in just a few minutes ~ it takes me all day. Well, that's the OCD again. If it's anyplace near crooked or if it has a little mark - or if it's just not right I start over.... But little missy sat down and made 4 of these! She has that ability. Me, I print of directions and read over them a couple times before I start on something.
Well, she made these and asked if I would take a picture like I do with my stuff. Of course I will. So, I had to show her creation off too...
Enough said for today ~ I will (hopefully) be back tomorrow with more. Have a great day!
Tuesday, December 04, 2007
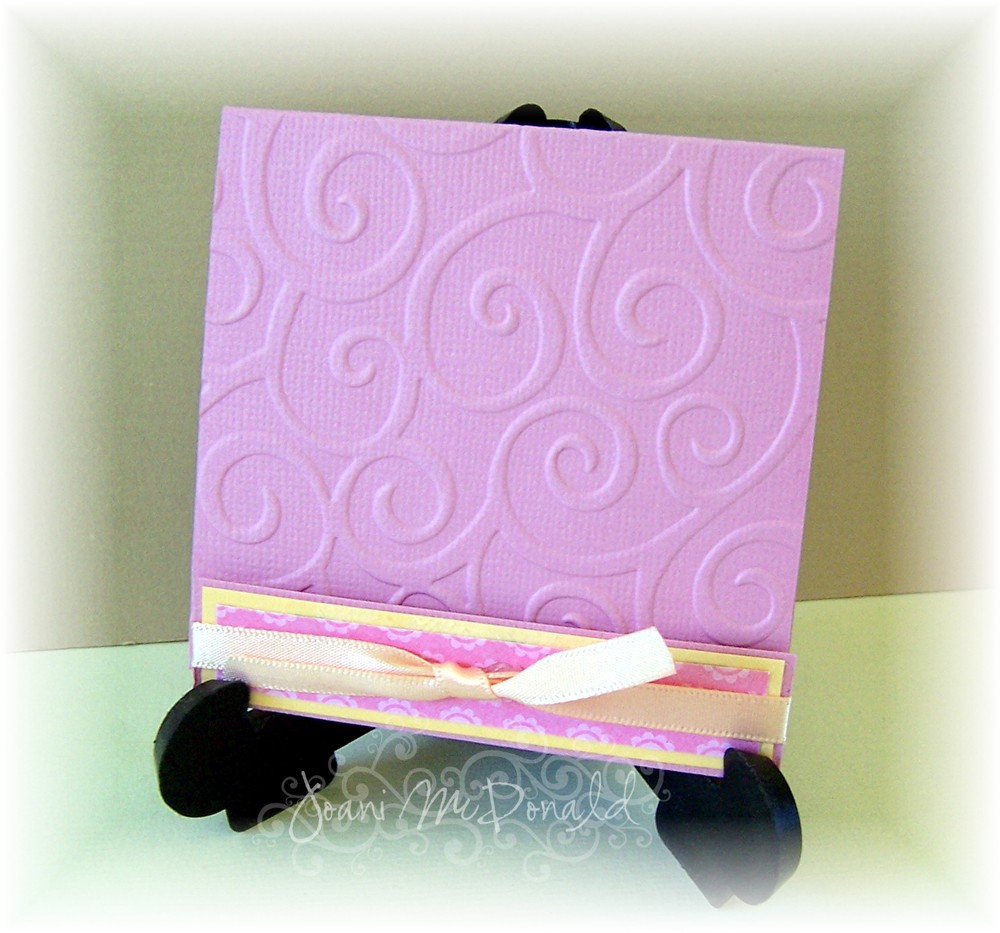
Post it Note Holder


Then score the paper at 3 1/8", 3 1/2", 6 3/4" and 7 1/8".
At this time you will cut a square of pattern paper (I used the *yummy* Dashing by SU! I'm gonna buy more before it goes away....) for the front cover. I also added a peice of ribbon before adhering the DP down.
I then cut a thin strip for the front flap.
Place adhesive on the back of the post it notes and place in the holder.