Don't miss out on these other pages!

Class Schedule

(502) 370-7632 Joani

Please call or email us to reserve your spot.

Showing posts with label Bind It All. Show all posts

Thursday, August 26, 2010

Howdy Ho Everyone!

We are almost thru another week, can you believe it?  As much as I don't want to admit it, it's getting closer to Christmas.  It's almost September ~ eek!!  I do enjoy Fall, it is my absolute favorite time of year.  The crispness in the air, the beautiful colors and the coming of sweater and sweatshirt weather.  When I was younger (and a lost smaller) I used to love summer - but now that I'm old (ugh...) I just don't enjoy the heat anymore.  Ok, enough of me babbling ~ you didn't come here for that.  Let's get to something crafty shall we?
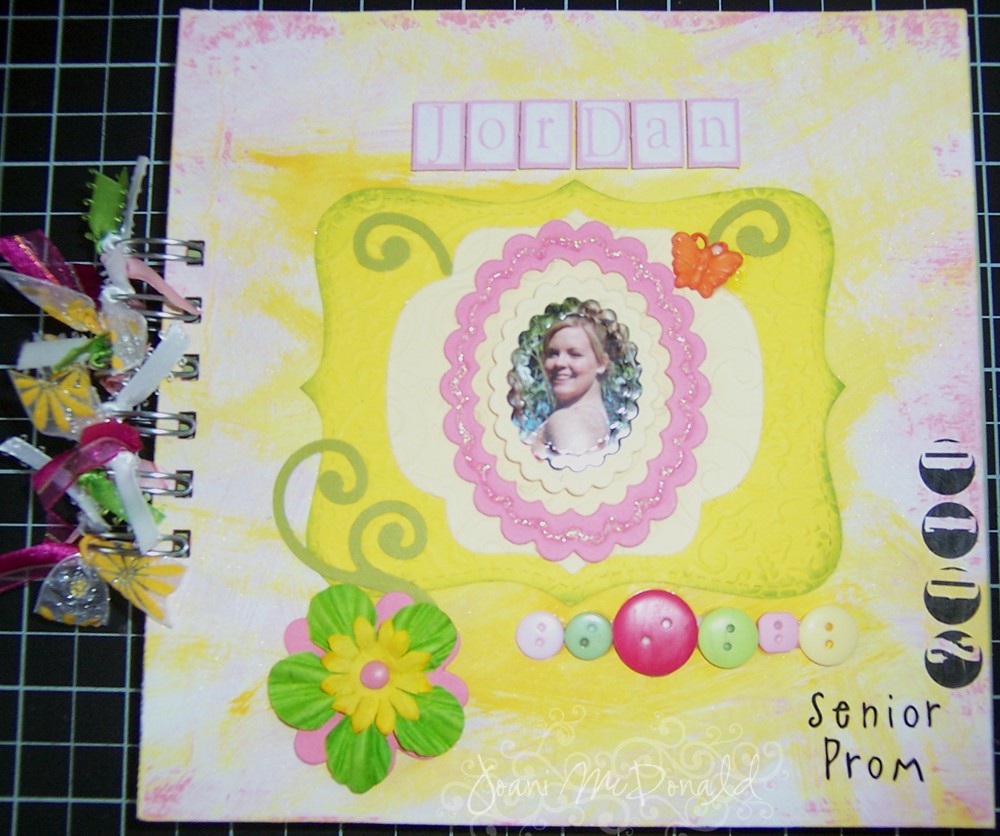
These little notepads I made with some of that "special" paper that we all have.  You know the paper that you just love and just cant put it in the cutter and use it ~ this is that paper for me.  Danielle had purchased some paper a while back at a sale and she split it with me.  The paper is from K&Company called Berry Sweet and it's just adorable.

I took some thin chipboard and covered it with the paper and Mod Podge and let it sit overnight under some heavy books.  The next day I used my BIA and put it together and decorated it. 
I used ribbon, primas, buttons, chip board accents from American Crafts, felt flowers, jewels, stickers and accent cutouts from my Storybook cartridge.
What I did was let these dry overnight because I covered the front and backs of both the front and back covers.  Then the next day I added the word "notes" and used Mod Podge again to seal the stickers.  I waited about a half hour to dry well enough then decorated them. 
When I made things like this I like to Mod Podge over the top to help seal the letters and just to protect the journal in general.  Trust me, nothing can penetrate Mod Podge - I've found that out the hard way.

I hope that you liked my little books ~ Come back tomorrow for something else that's "berry" sweet too!

Have a super great day!

Tuesday, April 27, 2010

Another scrappin' day...

I want to show you the other book that I made for Danielle's friends.  This one is for the other one of her twin friends.  Like I mentioned yesterday, the pictures are almost the same - but the layouts are different.  I hope that you enjoy them, and they spark some kind of creativity for you.
I love how this page turned out.  I love cutting the flowers and popping them up like this.
This shot was taken outside of a local coffee shop here in town.  We've got some really nice old buildings downtown.
I added some of the flowers that Mom made, and a butterfly too.
All the boys looked so handsome!
What a great bunch of kids!!

If you have any questions, just ask.  Like I mentioned yesterday ~ when I scrap there is stuff everywhere!!  It is really hard to keep track of what I used and from where and whom.  Most of the supplies used I listed in yesterday's post, but if I missed something (which I might of) just ask.

Have a great day!!

Monday, April 26, 2010

How about a little scrappin'?

This is pretty much what I was working on part of last week and most of the weekend.  I made a couple of books for Danielle's best friends of the prom.  Most of the pictures are the same for both of them, but the layouts are different.  Danielle gave them to the girls this morning ~ I can't wait to see if they liked them!
Here goes:
The books are a little different in size.  They are 7" x 7".  That is the fun thing about making your own books, you can make them whatever size you want.  This is the cover.  I used some thin chipboard and card stock that I adhered with Mod Podge.  I used some paints on the cover to to give it a little different look.  I cut the picture out with my nesties.  All the card stock that was used was Barely Banana, Regal Rose and Certainly Celery.  I also used the coordinating inks also.  The yellow piece that is under the picture here was in a box already cut, I think that it was YoYo Yellow but I'm not sure.  This is the only place that I used it because it matched the paint a little better.
All the DP that was used was from Paper Wishes.  I bought some of their paper by the pound.  You never know what your going to get, but it's fun. 
I used rub ons and various stamps. 
I used my Cricut machine to cut out the letters.  I used the Base Camp cartridge.
This paper was perfect!  It was some from Paper Wishes and I had a few sheets so I used it as a base and I took another sheet and cut out the flowers to pot dot on the top.  How pretty, huh?
I cant remember the vendor of these stamps, but I remember the collection name.  Silly huh?  It was Pollen Dust.
That's it for today. 

I hope that you find some inspiration in these pictures.  Have a great day, I'll see you again tomorrow!!

Monday, September 07, 2009

Some more trackers for you...

Ready for some more card organizers? Here they are.
This one is a little rustic looking, don't you think? I love these papers. They are from Daisy D's and I've been saving them for a while. I figured I don't need to hoard paper any longer, just use it. Maybe someone will get a little enjoyment out of what I make with them.
This one is a little brighter ~ but still fun. For some reason the paper reminds me of golf pants. I don't know why my brain thinks the way it does, it just does.
Remember you can print the inside months off from the SCS tutorial found here.
I did not do mine like the tutorial. I did not use 12" x 12" pages to create pockets inside. I just cut a 8 1/2" x 11" piece of cs for the inside, there are no pockets on each month. I only added one pocket to the back. You can see the inside on the last post, I opened it up to show you.
Does this inspire you? I sure hope so. I'll be back tomorrow with more creations.

My sneeky peeky

Carmen had guessed it, it's a card organizer!!

I just love these. They help me keep track of who's birthday is when. A must when you don't know what the date is most of the time ~ isn't that terrible.

Maybe if you've been a follower of my blog for a while you know that I made some of these last year. I loved mine so much that I thought that I'd make some for the fair that Betty and I are doing. I know that I'd love to get one Ü
What I generally do first is take some of the "chipboard" that hubby brought home from work and cut it down to my desired length and width. I think that these are 6" x 7 3/4". I take out my trusty mod podge and slather it on and cover it with paper. The paper that I used on this was from My Mind's Eye. I generally take my scrapbooks and set it on top of the organizer and let it dry good overnight. The next day I add the pages and make the holes with my BIA.
I couldn't help it, I had to make one that was with browns.
For the inside I stamped the SU! medallion stamp and the swirls from The Angel Company Butterfly swirls set. The pages were printed off from the SCS tutorial found here.
I hope that you like them ~ I will show more later.

Friday, July 24, 2009

Every have an ah-HA moment?

Have you ever had one of those ah-HA moments? I did!

I've always tried to take my new catties to the office supply store to have them wire bound. They seem to flip pages better, you can fold them over so they don't take so much room - it's just neater all around.

Well a couple of days ago I thought "dummy. You have a Bind-It-All". Yes, yes I do!!!

So I took my catties to the UPS store here in town and had them cut the glued spine off and I came home and punched the holes and wire bound it myself.

The Angel Company is having another one of their double rewards sales right now and if you place an order of $100.00 you can get not only one but TWO hostess Level A sets AND not one but TWO 1/2 off items in the catty! How cool is that!!! If you wanted you could get the Bind it All and the Scor-Pal ~ or whatever else in the catty you'd like for 1/2 off!

If you are interested just leave me a comment or e-mail me at joanmcdonald@roadrunner.com

Have a great rest of your day!!

Wednesday, May 13, 2009

Today's Happy Hump Day!

The middle of the week and only one more day til Joyce is here. Can you tell I'm excited to have my stampin' buddy here. It's been a year since we've seen here. Yet it's gone by so fast!

It's kinda funny, I'll give you a little history here. Just a little.

All the times that we've crafted together Joyce and I always ended up sitting next to each other. Now, I'm not sure that it was planned, but we were always next to each other. We would be sitting there making our cards, doing our own thing. Joyce would finish and I'd peek over at here and smile and say good job or whatever. Then came the "you know what you could of done...." It never seemed to fail. Then Joyce would say "why didn't you tell me then". And then I'd tell her because I was not paying attention. So now it's the standing joke, "you know you could of...." I guess you had to be there *Ü*


I made another flower book for the challenge over at PCP. Wanna see it??
Once again I used the my Cricut and the Accent Essentials and Walk in My Garden cartridges.
I covered all the pages with TAC's Winterberry paper collection and other plain card stock.
I used various embellishments like ribbon, brads, flowers. Like the cork flower? My friend Anne made that with her Big Shot and cork. Love it!!
The stamps are also from The Angel Company. I used A Blessing to Me, Small Sentiments and Floral Labels.I think it's kinda cute! What do you think??

Well, I'm off. I just heard the door bell ring and I think that the postman has a package for me. Nothing fun, just tape.

I hope that you have a great day. I will try to get on the computer early tomorrow to post. Tomorrow's going to be a busy day.

Have a great day!
Hugs,

Joani

Tuesday, May 12, 2009

Happy Tuesday!

I'm getting happier as the week goes by. Our dear friend from California, Joyce, will be here Thursday. Each year she's been kind enough to come visit us. And the time seems to go by so fast. This year she will be with us for 6 weeks! How cool is that? And even though it's a long time it will go by so fast I'm sure.....

This will be a short post for today, maybe.... I've got to finish a project on my desk and I'm anxious to get back to it.

The sneek peek from yesterday, remember? Well this is what I made. I love the Wednesday challenges on SCS. That community is one great place to be a part of!

Well the challenge last week was to make this backpack. At first because it shows so many steps I was a little worried. But it actually is so simple. If you can make a milk carton you can make this. They are kind of along the same lines. Anyway, here is the tutorial if you'd like to try one yourself. I used Close to Cocoa and Creamy Caramel cs for the backpack. I stamped the flowers all over the cs before scoring and putting it together. I don't remember the name of the stamp, but it was a large roller from SU! I stamped it with Chocolate Chip ink. A few eyelets, some ribbon, some rub on's and I was done. I gave it to Danielle and she looked at me like Mom's done it again. I have so many little boxes, bags and creations around here I have no idea what to do with them all!

The next thing I want to show you is what I made for the May Challenge over at PCP. This month I put up the challenge on the BIA group I belong to. If anyone is interested, go to PCP and join up with the Bind It All group and you can play. I love my BIA!! I'm always looking at things different to see if I can do something with my machine.

Anyway, the challenge is to make a book in the shape of a flower. Well, mine is a flower and a pot, but same thing....

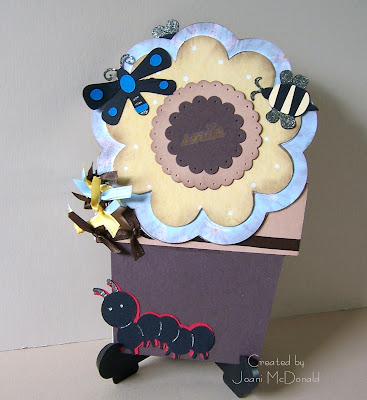
I used some of that thin chipboard that hubby brought home and cut it out with my Cricut. Then I covered it with some DP and Mod Podge, and let it sit for a while. The flower is cut from the Accent Essentials cart (thanks Anne for letting me borrow it!!) and the flower pot and the buggies are all cut from Walk in my Garden. I stamped the inside pages with my TAC set A Wittle Bug. So, what do you think? You up for the challenge? The winner is getting 2 packages of O Wires from me. Stop on over here and sign up....

Well, so much for a short post... I will be back tomorrow to show you some more!
Have a great day!
Hugs, Joani

Tuesday, March 10, 2009

Ready for the peek?

Yesterday I showed you a little peek at what I've made. Ready to see it?

Ok, first let's show you a card - maybe two....

Yesterday I made my last St. Patrick's day card for this year. I love to make cards for all holidays! I used to actually make them for groundhog day also - but I got rid of that stamp. But for some reason I'm not into St. Patrick's day this year. Hmmm, I don't know why? I'm married to an Irishman. I guess I'm just not feeling it. And I think that it shows in my cards.

Yes, this is my LAST card for St. Patrick's day. Promise. Most of the paper was pulled out of my scrap drawer. I have two 12" x 12" drawers that are dedicated to just scraps. Some of them have the company name on them and some don't. Of course, these don't.
My base card is Glorious Green. I layered it with a piece of this dark green shimmer paper and the polka dot paper. Then I added another layer of dark green shimmer paper with a layer of shamrock paper. I added a length of ribbon and the little leprechaun from Whipper Snapper that I colored with my watercolors. I did add some white dots around the image with my gel pen. And if you look in the bottom right corner you will see 3 baubles. I just got those, they are from The Robins Nest and I love them!

For the inside I stamped the image, also from Whipper Snapper, and just went over the lettering with my markers. I added a piece of Basic Black under the white and added a strip of the shamrock paper to the top of the white panel.

Remember me showing you the new set's I got from The Angel Company? Well, here's a card that I made with one of them.
This is made from the Everything is Blooming T3050 set. I just love that little girl, she's adorable!
The base card is So Saffron. I layered it with a piece of Kiwi Kiss and Summer Sun. The DP is also from TAC it's from the Brighten my Day collection. I just cut 3 small strips to layer on the card and added some ribbon before securing it down. I stamped the image and colored her in with my watercolors. I sponged some Pink Passion ink around the layer and adhered it to a piece of Pretty in Pink and Pixie Pink cs. I added a Bitty Blossom and brad to the lower left hand corner and I was complete.
Ok, yesterday I showed you a sneek of what I made, well here it is.


You can say that I was a late bloomer when it came to getting a cuttlebug. Being a one income family I try to choose things that I need carefully. But thanks to Mrs. Betty I could not live without this, so at Christmas Mom bought one for us. It was our crafting Christmas present. And yes, I've since HAD to purchase some nestabilities! Ok, 6 of them. But it was a MUST, really. It's actually a sickness. I can't help myself sometimes.....

So the other day I thought I'd make a book of the nesties that I have now. And since HSN was kind enough to send me an email telling me that March was National Craft month I thought that I would do my part to boost the economy Ü

I made my covers from some thin chipboard with my Bind it All. I covered them with paper from TAC's Catelynne collection (which is my FAVORITE!), some ribbon, buttons, and a chipboard piece from American Crafts. If you look close you can see that I sprayed the cover with some shimmer mist for a little glow. I also used my Labels 2 nestie to cut some paper for the cover.

Now on the inside I've got all the negatives labeled with each family. This way I can see which size will fit with which stamp. I have also started to write down which one fits with which for now, at least til I get more sets. Um, I mean, uh, well you know what I mean..... (Just in case hubby's reading Ü)

Well, did you like today's post? I hope to have something special for tomorrow. Tired of having your stickles not flow just right? I have a great idea of storing them ~ I just need to acquire the help of my hubby and I'll show you.

Have a great day!
Hugs,

Joani

Thursday, January 15, 2009

Ok, NOW it's Thursday!

My goodness, at least I've got the day right ~ that's a start!! But yesterday did prove to be a good day. I was busy as a bee.....
Wanna see? But first you've got to listen to my babble, but it wont take long - PROMISE!
  1. My dear friend Betty has some SU! set's for sale - take a peek HERE.
  2. Don't forget to sign up for my yummy blog candy. Tonight ends the sign up, and tomorrow I will be picking a winner - so don't lose your chance!
  3. Spec-TAC-ular Savings Promotion!! From January 6-26, Choose ANY T-coded merchandise in the Fall/Winter Inspiration Book & Catalogue for 50% off the regular retail price!!! Whether you choose 1 set or 20, each and every T-coded stamp set that you choose is half-price! Begin 2009 with a fresh, new stash of the stamp sets that have been on your wish list! You can e-mail me with your order Ü

That was not too painful was it??? Now are you ready to see what I've been up to? Ok, here goes....

Remember the other day when I mentioned the site I found called Making Mini Scrapbooks (which I have linked on my sidebar)? Well I had printed off the Christmas Card Tracker that she had. OMGoodness, years ago I had one that I bought from Current and loved it. I generally use pencil on things like this and address books ~ and mine was used over and over again. Years beyond what it was made for. So you've got to know when I found this site I was so excited!! So I made one yesterday for my cousin Dolly and myself.
For Dolly's I used all TAC paper, called Mulberry Meadow. I thought that it was pretty. I used a few different punches, added rick rack and ribbon, buttons, rub-on's and a few primas. I think that it turned out kinda nice, don't you?

Then I made mine.

(The last image I accidently deleted and for some reason Blogger wont let me re-post it. Sorry!)

On mine I used all SU! DP. I love apples, I have that theme in my kitchen ~ and of course I've saved the paper forever so it was time to use it! I added rick rack, ribbons, buttons and some rub-on's from Marcella K - that by the way I thought worked perfect with the colors.
Lately when I make things like this - or sometimes even cards, I like to use my glue gun to add flowers or buttons. It's fast, and the glue gun is low temp so it does not wrinkle the paper. That way I know they stay put. There is nothing worse than getting a card that has things that fell off of it.
Ok, I've got one more thing to show you. I made a little album for family photos. I guess I was on a Bind-It-All album making kick yesterday!

More of the same. SU! DP, ribbon, buttons, flowers.... The sentiment was done on the computer. The covers on all of the albums are this thin cardboard like stuff that hubby brought home from work. I cover both sides with paper, but I use my Mod Podge to adhere it. I love that stuff!! Once it's dry it because harder so the covers are stiff. Of course I had to sit on it while it was drying to keep it flat...
Today was a long post, yes. So thank you for sticking it out with me. I better go and do something constructive now, huh?
Here's to wishing you a great (and warm) day!
Hugs,
Joani