Don't miss out on these other pages!

Class Schedule

(502) 370-7632 Joani

Please call or email us to reserve your spot.

Showing posts with label BIA. Show all posts

Thursday, August 26, 2010

Howdy Ho Everyone!

We are almost thru another week, can you believe it?  As much as I don't want to admit it, it's getting closer to Christmas.  It's almost September ~ eek!!  I do enjoy Fall, it is my absolute favorite time of year.  The crispness in the air, the beautiful colors and the coming of sweater and sweatshirt weather.  When I was younger (and a lost smaller) I used to love summer - but now that I'm old (ugh...) I just don't enjoy the heat anymore.  Ok, enough of me babbling ~ you didn't come here for that.  Let's get to something crafty shall we?
These little notepads I made with some of that "special" paper that we all have.  You know the paper that you just love and just cant put it in the cutter and use it ~ this is that paper for me.  Danielle had purchased some paper a while back at a sale and she split it with me.  The paper is from K&Company called Berry Sweet and it's just adorable.

I took some thin chipboard and covered it with the paper and Mod Podge and let it sit overnight under some heavy books.  The next day I used my BIA and put it together and decorated it. 
I used ribbon, primas, buttons, chip board accents from American Crafts, felt flowers, jewels, stickers and accent cutouts from my Storybook cartridge.
What I did was let these dry overnight because I covered the front and backs of both the front and back covers.  Then the next day I added the word "notes" and used Mod Podge again to seal the stickers.  I waited about a half hour to dry well enough then decorated them. 
When I made things like this I like to Mod Podge over the top to help seal the letters and just to protect the journal in general.  Trust me, nothing can penetrate Mod Podge - I've found that out the hard way.

I hope that you liked my little books ~ Come back tomorrow for something else that's "berry" sweet too!

Have a super great day!

Tuesday, April 27, 2010

Another scrappin' day...

I want to show you the other book that I made for Danielle's friends.  This one is for the other one of her twin friends.  Like I mentioned yesterday, the pictures are almost the same - but the layouts are different.  I hope that you enjoy them, and they spark some kind of creativity for you.
I love how this page turned out.  I love cutting the flowers and popping them up like this.
This shot was taken outside of a local coffee shop here in town.  We've got some really nice old buildings downtown.
I added some of the flowers that Mom made, and a butterfly too.
All the boys looked so handsome!
What a great bunch of kids!!

If you have any questions, just ask.  Like I mentioned yesterday ~ when I scrap there is stuff everywhere!!  It is really hard to keep track of what I used and from where and whom.  Most of the supplies used I listed in yesterday's post, but if I missed something (which I might of) just ask.

Have a great day!!

Monday, April 26, 2010

How about a little scrappin'?

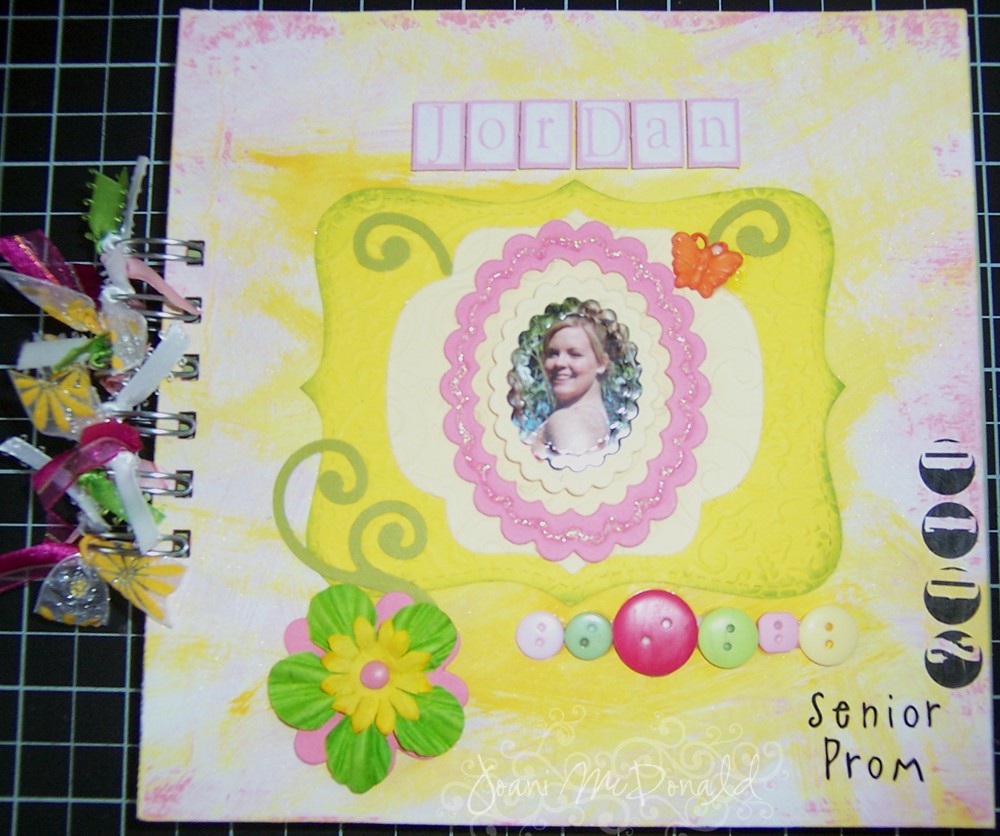
This is pretty much what I was working on part of last week and most of the weekend.  I made a couple of books for Danielle's best friends of the prom.  Most of the pictures are the same for both of them, but the layouts are different.  Danielle gave them to the girls this morning ~ I can't wait to see if they liked them!
Here goes:
The books are a little different in size.  They are 7" x 7".  That is the fun thing about making your own books, you can make them whatever size you want.  This is the cover.  I used some thin chipboard and card stock that I adhered with Mod Podge.  I used some paints on the cover to to give it a little different look.  I cut the picture out with my nesties.  All the card stock that was used was Barely Banana, Regal Rose and Certainly Celery.  I also used the coordinating inks also.  The yellow piece that is under the picture here was in a box already cut, I think that it was YoYo Yellow but I'm not sure.  This is the only place that I used it because it matched the paint a little better.
All the DP that was used was from Paper Wishes.  I bought some of their paper by the pound.  You never know what your going to get, but it's fun. 
I used rub ons and various stamps. 
I used my Cricut machine to cut out the letters.  I used the Base Camp cartridge.
This paper was perfect!  It was some from Paper Wishes and I had a few sheets so I used it as a base and I took another sheet and cut out the flowers to pot dot on the top.  How pretty, huh?
I cant remember the vendor of these stamps, but I remember the collection name.  Silly huh?  It was Pollen Dust.
That's it for today. 

I hope that you find some inspiration in these pictures.  Have a great day, I'll see you again tomorrow!!